What Necklace Is This? How to Identify a Necklace From a Photo
Identify a necklace style from a photo with practical photo clues, comparison steps, limits, and verification guidance for what necklace is this.
Quick answer for what necklace is this
If your question is “what necklace is this,” start by describing the visible structure: is it a plain curb chain, a rope chain, a pendant on a bail, or a choker with an integrated plate? A phone photo can usually show style family (chain type, pendant shape), how the pendant attaches (bail, jump ring, fixed), and obvious construction details like solder joins, visible prongs, or bezel edges. Those clues narrow matches from “necklace” to categories such as chain-only, pendant-on-chain, station necklace, or locket.
A single image can reliably suggest form and style but rarely proves maker, metal purity, or market value. Hallmarks, maker’s marks and subtle repair signs often require a macro detail shot, good lighting, and sometimes magnification. Also note that plating, heavy wear, or aftermarket repairs can mask original features—what looks like gold in a diffused photo might be gold-plated brass once you inspect the clasp and inside edges.
Use the photo to assemble a short checklist: chain type, clasp style, pendant attachment, visible hallmarks, and wear patterns. If you want a faster, more systematic pass, scan these photos with an app to group likely matches—but always treat a photo-based ID as provisional until you can inspect the item up close or consult a professional for maker verification or valuation.
- Primary visible answers from a photo: chain family, pendant style/attachment, clasp type, and clear hallmarks or stamps.
- What a photo cannot prove: maker authenticity, exact metal purity, or market value without hands-on inspection.
- Helpful extra context that raises confidence: scale reference, multiple angles, and a close-up of any stamps, clasps, or soldered joins.
Photo checklist
Good photos make identification practical. Before you try to identify “what necklace is this,” collect a short, specific set of images that show the necklace at useful scales and angles. You don’t need professional gear—smartphone images are fine if you follow a few focused steps.
Aim for consistent lighting and neutral backgrounds so surface texture, joins, and hallmarks are readable. Avoid flash glare that washes out fine edges; soft daylight or diffused LED lighting from the side usually works best.
- Full-length shot: lay the necklace flat or hang it so the whole length is visible (helps identify clasp placement, station spacing, and overall style).
- Scale reference: include a ruler, a coin, or a common object near the necklace so chain thickness and pendant size are clear.
- Close detail shots (2–3): one of the clasp, one of the pendant attachment (bail, jump ring, or integrated), and one macro of any stamps/hallmarks or prong/bezel edges.
- Angled edge shot: capture the pendant or chain edge at a shallow angle to reveal construction—solder seams, hollow vs. solid links, prong profiles, and plating wear.
- Context shot: optional photo of the necklace worn on the neck; shows drop length, how the pendant sits, and whether it’s meant to be tight (choker) or draping.
Visual clues
When answering “what necklace is this,” prioritize clues that are stable under normal photography: link shape and pattern, clasp type, how a pendant attaches, and any readable marks. These are less affected by color balance and more by geometry—easy to pick up from a phone photo.
Chain construction: recognize link families (box, curb, rope, cable, Figaro, snake). A box chain shows square links with flat faces; rope chains twist visible tiny links that look braided; snake chains appear smooth and rounded with minimal gaps. Thickness and how rigid the chain is also hint at whether it’s hollow or solid—very flexible and thin often means hollow or plated.
Clasp and hardware: clasps are diagnostic. Lobster clasps are modern and secure; spring rings are common on older or lighter necklaces; barrel and screw clasps often indicate mid-20th-century design or costume jewelry; hook clasps and S-clasps show hand-finished work or vintage styles. Look at the jump ring where the clasp meets the chain—solid soldered rings vs. open rings reveal quality and possible repairs.
Pendant attachment and setting: a pendant fixed to a chain (no bail) suggests a decorative plate or integrated design; a bail or large jump ring indicates interchangeable pendants. Settings tell material handling: prongs with pointed tips usually secure faceted stones; bezels wrap metal around an element (common in vintage and artisan work); flush-set or channel-set elements point to manufacturing precision.
Hallmarks and stamps: readable marks (925, 750, maker initials) are strong evidence but require a macro shot. Location matters—clasps and interior backs of lockets are common places for stamps. If you can’t read the mark in photos, note its presence and relative location for later inspection.
Wear patterns and repairs: look for thinning at high-contact areas (underside of a chain, inside of a pendant), green verdigris at jump rings (suggesting base metal under plating), or mismatched solder color on links (indicating repair). These are clues about construction and finishing, not definitive proof of metal content.
- Stable geometry clues: link shape, pattern repeat, and edge profiles—more reliable than color.
- Hardware reveals period and quality: clasp types and their solder/jump-ring condition.
- Attachment style (bail vs. fixed) indicates whether pendants are original or interchangeable.
- Readable stamps give the best hard evidence—note location and clear photos of any marks.
Examples by type
Concrete comparisons help convert “what necklace is this” into a shortlist. Below are common necklace types and the visual features you’ll see in photos. Use these to quickly eliminate mismatches.
1) Chain-only necklaces: These have no pendant and are identified by link family and thickness. Example: a 3.5 mm curb chain with flattened links and visible solder seams at each link is likely a classic curb/trace style used for daily wear. A thin, flexible 1.0–1.5 mm snake chain with a smooth surface suggests modern plated fashion jewelry or a delicate solid gold chain.
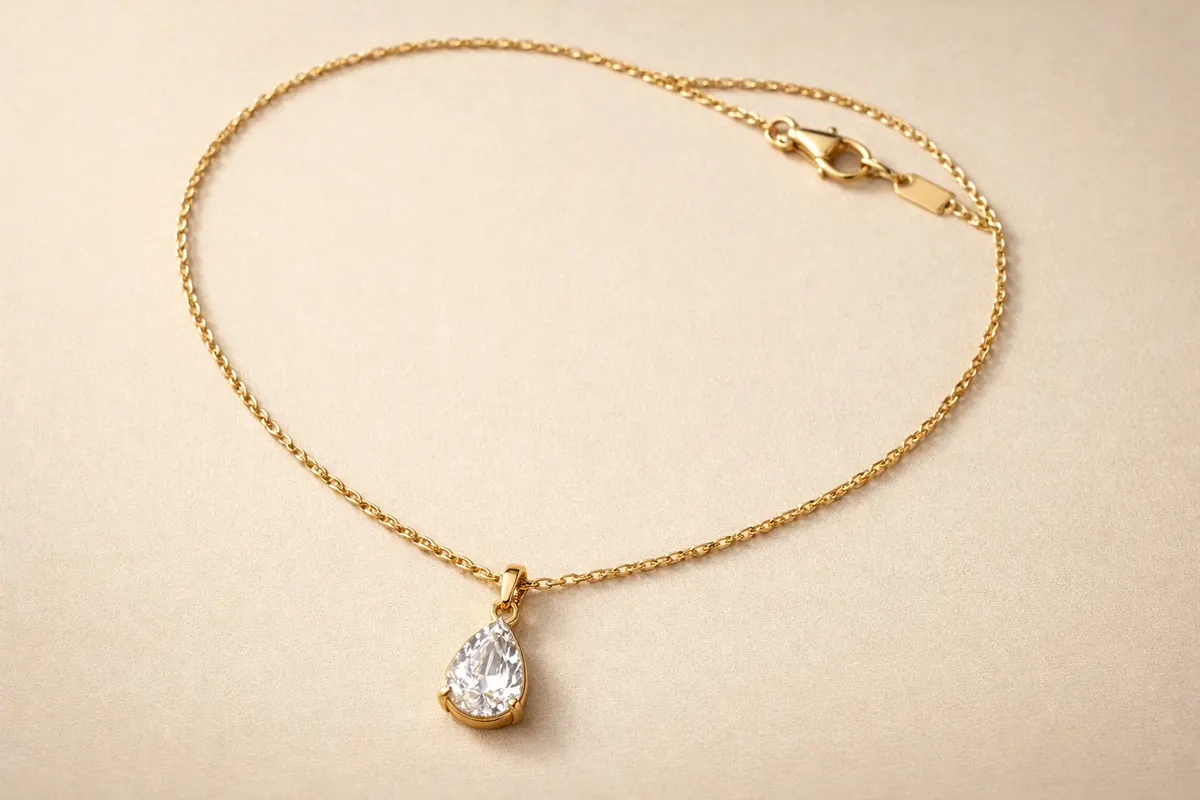
2) Pendant-on-chain: Look at how the pendant hangs. Example: a heart-shaped pendant with a large open bail and visible prong tips around a stone suggests later 20th-century fashion pieces. A locket with a hinge line and interior photo compartment is visually apparent from front and side images and often includes a small hinge pin visible at one edge.
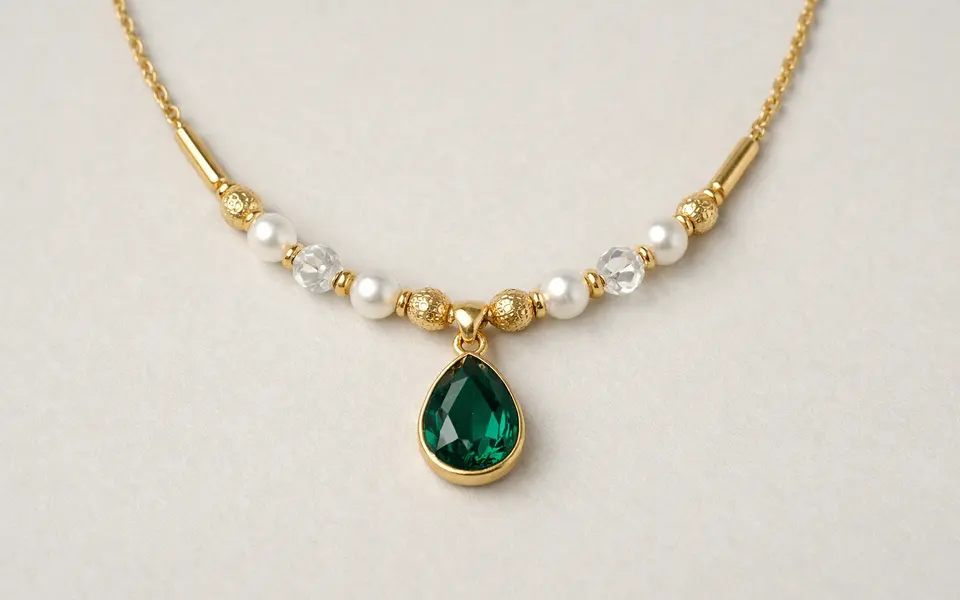
3) Station and beaded necklaces: Station necklaces have spaced elements attached to the chain at regular intervals—tiny bezel-set stones or decorative discs. Beaded necklaces show thread or wire between beads; knotting between beads (visible close-up) often indicates silk-threaded pearls or higher-end construction.
4) Chokers and collars: Short necklaces sit high and often have integrated plates or rigid construction. Example: a flat curb choker with a box clasp and safety chain generally reads as mid-20th-century or contemporary designer choker depending on finish and hallmarks.
5) Vintage and artisan indicators: Hand-hammered textures, visible tool marks on bezels, and nonuniform prong shapes point to handmade or vintage work. Machine-perfect symmetry, identical prong tips, and micro-finished edges suggest factory production.
- Chain-only: identify by link family and thickness.
- Pendant-on-chain: check bail size, prong/bezel style, and hinge lines for lockets.
- Station/beaded: look for regular spacing and knotting between beads.
- Chokers/collars: rigid construction and clasp placement indicate intended fit.
- Vintage vs. factory: tool marks and asymmetry → handwork; micro-finish and perfect symmetry → factory.
Compare likely matches
When two necklaces look similar in a single photo, compare multiple clues together instead of relying on one detail. For example, a rope chain and a wheat chain can appear similar at a glance; inspect link junctions, twist tightness, and how light plays across edges to separate them.
Create a short evidence matrix: chain family, clasp type, pendant attachment, hallmark presence, and wear indicators. Compare your photo to candidate images and mark matches on that matrix. A candidate that matches four of five clues is a stronger lead than one matching just link pattern.
Examples of separating close matches: if a pendant is framed by a thin bezel, that suggests a different manufacturing process than a pendant with tiny uniformly spaced prongs. If two chains look identical but one has a soldered jump ring at the clasp and the other an open ring, that difference often signals aftermarket repair or different quality standards—and may rule out one match as original pairing.
Also look for supporting context: packaging, visible design motifs (e. g. , maker-specific stamp patterns or signature motifs), and the chain’s end fittings. These secondary clues are especially helpful when color and stone appearance are unreliable due to lighting.
- Use a 5-point evidence matrix: chain family, clasp, pendant attachment, hallmark, wear/repair signs.
- Favor matches with multiple agreeing clues; a single matching trait is weak evidence.
- Secondary context—packaging, signature motifs, end fittings—can tip a close comparison.
Common mistakes
Avoid these common errors when identifying “what necklace is this” from photos. First, don’t equate color with metal type. Lighting, camera auto-white balance, and plating can make base metals look like gold or silver. Instead, inspect edges, inside bends, and the clasp where plating wears first.
Second, don’t assume a visible stamp is accurate without a clear photo. Counterfeit or aftermarket-stamped clasps exist; an unreadable or smudged stamp shouldn’t by itself prove metal content or maker. If the mark is important, get a macro shot and, where possible, confirm with a jeweler’s loupe.
Third, avoid relying on a single angle. Many identification errors come from foreshortened pendants or unseen repairs. A pendant may appear flush-set from the front but actually be a glued-in element visible from the side. Collect at least one edge shot and a close view of where the pendant meets the chain.
- Don’t trust color alone—inspect edges and high-wear areas instead.
- Don’t assume unreadable or partial hallmarks are definitive.
- Don’t make final calls from a single angle—get a side shot and close-up of attachment points.
- Watch for aftermarket repairs: mismatched solder, inconsistent metal tone, or nonuniform jump rings.
App workflow
Using the Jewelry Identifier app speeds the first-pass sorting of candidates after you gather the checklist photos. The app is designed to group visual features—chain family, clasp type, pendant attachment, and readable marks—so you can quickly narrow to the most likely categories. Treat the app’s results as a prioritized shortlist rather than a certificate of authenticity.
A practical workflow: import your photos into the app after following the photo checklist, tag each image (full-length, clasp, hallmark, edge), and let the app compare against its visual library. Use the app’s suggested matches to pick 2–4 close candidates, then re-evaluate those using your evidence matrix (chain family, clasp, attachment, hallmark, wear).
If the app highlights unreadable hallmarks or conflicting clues, return to step one: take an improved macro shot of the clasp or inside the locket with a diffused light source. The app accelerates triage but cannot replace magnification or hands-on verification when maker identification or valuation matters.
- Tag photos by type (full, clasp, hallmark, side) before scanning.
- Treat app matches as candidates—re-check each with the 5-point evidence matrix.
- If the app flags unclear or low-confidence items, retake macro shots and rescan.
Next steps by confidence level
High confidence: if photos show a clear hallmark, consistent construction, and multiple matching clues to a known style or maker, you can proceed to price research or provenance checks. Still, for resale or insurance, get an in-person appraisal or stamped lab report—photos alone are not enough for formal valuation.
Partial confidence: when some clues line up (chain family, clasp) but hallmarks are unreadable, attempt higher-resolution macro photos or consult the app to widen candidate sources. Consider posting careful photos to specialist forums or asking a reputable local jeweler to glance at the item—preferably someone who will not try to purchase it immediately.
Low confidence: if the photo is poor, the piece shows heavy repairs, or multiple features conflict (e. g. , plated appearance with a clearly modern clasp), treat the ID as provisional. Avoid buying or selling based purely on the photo. If verification matters (authenticity or value), schedule an in-person inspection with a qualified jeweler or gemologist.
- High confidence → consult a professional for appraisal/valuation before formal steps.
- Partial confidence → retake macro/detail photos and use app/forum input to narrow candidates.
- Low confidence → do not transact solely on photo ID; get hands-on inspection.
Limitations
Photos are powerful but limited. You can identify style, visible construction, and often find likely matches from image comparison, but a photo cannot conclusively verify maker origin, confirm precious-metal purity beyond what a hallmark suggests, or guarantee market value. Corroded or plated items can be misleading in color and surface texture.
Some tasks simply require tools or tests that a photo cannot provide: acid tests or XRF analysis for alloy content, microscopic examination for hallmark engraving depth or hidden maker’s punches, and provenance checks through paperwork or factory records. Always treat photo-based identifications as provisional and escalate to hands-on verification where legal, financial, or sentimental stakes are high.
Finally, be cautious about sharing images publicly if the piece has a unique maker mark or personal engraving. Privacy and provenance can be sensitive; if the necklace is part of an estate or has identifiable engravings, consider blurring personal marks before posting publicly.
- Photos can show style and construction but cannot prove metal purity or maker with certainty.
- Laboratory or in-person tests are needed for definitive metal and maker verification.
- Protect privacy—blur personal engravings before sharing images publicly.
Related guides
Scan necklace details with the Jewelry Identifier app
Use the Jewelry Identifier app to quickly group likely matches after you take the checklist photos (full-length, clasp, hallmark, and edge shots). Treat the app’s results as a prioritized shortlist—then follow the next-steps above (retake macro photos or get a professional inspection) for any authentication or valuation needs.
Frequently asked questions
Can I identify the value of a necklace from a photo?
No. A photo can suggest materials, style, and likely market comparisons, but it cannot provide a reliable value. Valuation requires hands-on inspection, testing for metal content (acid test or XRF), assessment of stone quality (if applicable), and knowledge of provenance and current market conditions. Use photos to form a preliminary idea, then get an in-person appraisal for formal valuation.
Where should I look for hallmarks or stamps in photos?
Common hallmark locations are the clasp, the inside of lockets, the back of pendants, and on the inside of larger jump rings or end fittings. When photographing, include a close-up of the clasp and the pendant back or hinge area. If a stamp is very small, try a macro mode, a magnifying loupe against the phone lens, or stronger diffused light to improve legibility.
How can I tell if a pendant is original to the chain from photos?
Compare attachment style and wear. An original pairing usually has a compatible bail size and matching metal tone and solder quality; the jump ring placement and solder finish will be consistent. Signs of mismatch include a different metal tone at the jump ring, an open non-soldered ring added later, or visibly different aging/wear on the pendant versus the chain. Side and clasp shots help confirm whether the pairing looks factory-made or aftermarket.
Will the app tell me if a necklace is authentic or how much it’s worth?
The Jewelry Identifier app speeds visual matching by grouping likely styles, chain families, and readable hallmarks, but it does not certify authenticity or provide definitive valuations. Use the app’s matches as a shortlist for further investigation. For authenticity or formal valuation, follow up with a trusted jeweler, certified appraiser, or laboratory testing. The app is a first-pass tool, not a substitute for hands-on verification.