

How to Recognize Common Jewelry Types: A Practical Guide
Quickly identify jewelry types with visible marks, settings, and construction details. Photo tips, common lookalikes, and what to verify next.
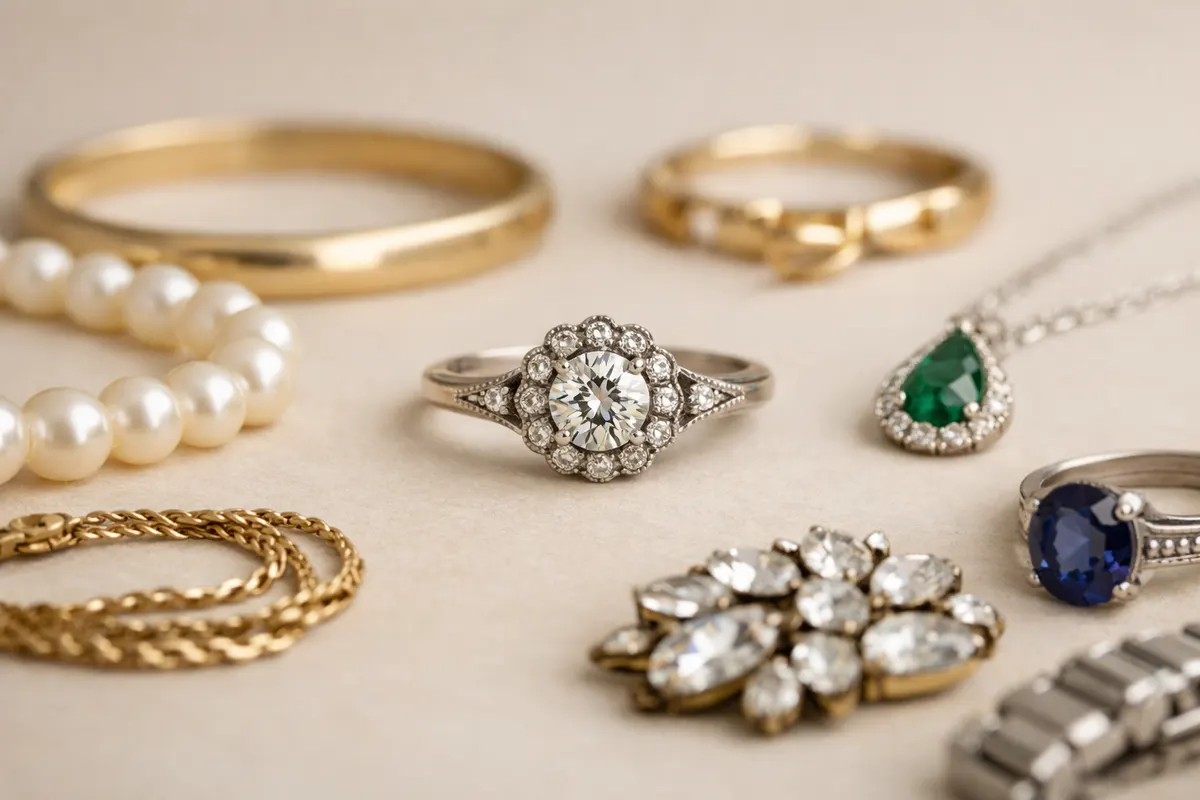
Quick answer: How to tell jewelry types at a glance
Start with how the piece is worn. A pin and catch suggest a brooch, a loop for a chain suggests a pendant, and a band sized for a finger suggests a ring. Material is a separate question. A 925 or 14K stamp records a claim about the metal. Photograph the mark and, if that claim affects a purchase or appraisal, ask a qualified jeweler to test the piece.
For a fast, practical check, photograph the piece from four angles: face, side, back, and clasp or hinge. Look for hallmarks on the inside of rings or the back of pendants, examine solder joins and clasps for manufacturing quality, and compare the design to known categories (e.g., cluster ring, pendant with bale, chain with lobster clasp). These visible signals usually let you assign a likely jewelry type, but they rarely prove age or value without further verification.
- Start with metal marks and visible stamps to narrow metal type.
- Use setting and construction details (prong vs bezel, cast vs hand-fabricated) to refine style and probable category.
- Photo four consistent angles: face, side, back, and closure for quick comparison.
What we mean by jewelry types and why it matters
When I say “jewelry types,” I mean the functional and stylistic categories collectors and sellers use: rings, necklaces, earrings, brooches, pendants, bracelets, and subcategories such as signet rings, solitaires, cluster brooches, or curb chains. The label points to how the piece was made and worn, which in turn affects materials, construction, and likely historical period.
Knowing the jewelry type matters because it focuses your inspection. A ring’s inner band is the usual place to find metal hallmarks and size stamps; necklaces hide chain marks near the clasp; brooches and cufflinks reveal maker marks on hinge plates. Understanding where to look and what to expect saves time and reduces misidentification—especially when pieces imitate higher-value types.
Types also set realistic expectations. For example, costume jewelry may copy the silhouette of a Victorian brooch but use different soldering, glued stones, and base-metal clasps. Distinguishing the type helps you judge whether to pursue further authentication, a valuation, or simply keep the piece as a decorative object.
- Functional category (ring, pendant) directs where to inspect for hallmarks and construction clues.
- Style subcategory (solitaire, pave, signet) suggests typical settings and maker techniques.
- Recognizing the type helps separate lookalikes (costume vs fine) before spending on tests.
Jewelry visual clues to check
Visual clues are the fastest, most repeatable evidence you can collect from photos or close inspection. Hallmarks and stamps are the highest-confidence identifiers for metal composition and sometimes origin—common examples are “925” for sterling silver, “750” for 18K gold, or assay marks from national offices. These marks should be crisp and located where the piece was formed to stamp, such as the inside of a ring shank or the underside of a pendant.
Construction and finish reveal whether a piece is factory-cast, hand-finished, or assembled from components. Look for consistent tool marks, solder seams, and the way prongs are finished. High-quality fine jewelry usually has clean, even prongs set to the stone and inconspicuous solder joints; lower-quality costume or plated pieces may show visible glue, rough solder, or odd weight distribution.
Settings and stone treatment are key. A bezel setting that entirely surrounds a stone is common in vintage and artisanal jewelry; prong settings are typical for solitaires and faceted gemstones. Pavé and micro-pavé indicate higher-level finishing and usually finer materials, while glued cabochons and pressed mounts point toward costume jewelry.
Wear patterns and discoloration help confirm the real material over the long term. Gold-plated items often show base metal where edges rub (revealed by a copper or brass color under worn plating). Sterling silver will develop a characteristic darkened patina in recessed areas. Check clasps and hinge pins for metal exposure; these hidden places often reveal plating loss before the visible surfaces.
- Hallmarks and numeric stamps (e.g., 925, 750) — highest immediate confidence.
- Maker’s marks and assay symbols — can hint at origin but aren’t proof of authenticity alone.
- Prong shape and finish — rounded, tapered prongs suggest hand-setting; uniform prongs suggest machine setting.
- Solder seams and internal joins — neat, filed joins indicate higher craftsmanship.
- Stone backing and attachment — glue or bezel lip vs pierced seat and prong mounting.
- Clasp type and quality — spring-ring vs lobster vs barrel: clasp durability often matches material quality.
- Wear-through color — exposed base metal at edges signals plating, not solid metal.
- Weight and balance — hollow cast items feel light; solid-gold pieces have denser heft.
Step-by-step workflow to identify jewelry types
1) Photograph and document: take clear photos from the face, side, back, and of any marks or hallmarks. Use a ruler or coin for scale and good lighting to show color and finish. Consistent photos let you compare features and share evidence with app tools or experts if needed.
2) Read marks under magnification: use a loupe (10x) or a macro lens on your phone to inspect inside bands, backs, and hinge plates for stamps. Record the exact letters, numbers, and symbols. A stamp narrows metal type; a maker’s mark can guide provenance searches but should be corroborated with other clues.
3) Inspect construction and settings: note the type of setting, whether stones are glued, prongs are soldered, and how the piece is joined. Open jump rings, uneven solder, or visible glue often indicate lower-end manufacturing.
4) Cross-check lookalikes and tests: compare the piece’s features to known lookalikes—gold-plated vs solid, costume silver vs sterling, synthetic vs natural stones. Simple, non-destructive tests like a magnet test for ferrous base metals and a specific-gravity feel can be helpful, but reserve destructive tests (acid or stone removal) for professionals.
- Photo: face, side, back, closure; include scale.
- Magnify and transcribe any hallmarks or maker’s marks.
- Analyze settings, solder quality, and clasp functionality.
- Run simple non-destructive checks (magnet test, weight feel) before any invasive testing.
- If uncertain, gather evidence and consult a qualified appraiser or the Jewelry Identifier tools linked below.
Examples: Common types and how to recognize them
Engagement ring (solitaire or halo): look for a central faceted stone set in prongs or bezel, hallmark inside the shank, and a predictable ring profile. A fine solitaire will have tight, even prongs and a hallmarked shank; a reproducing costume ring may show glued settings or thin, flared prongs.
Pendant or locket: pendants often have a bail and a stamped back or inside lid. Lockets have hinged backs and a thin profile to hold photos; their hinges and interior finishing give away mid-century or antique manufacture versus modern costume copies with stamped seams and glue.
Brooch or pin: check the pin stem, catch style, and the hinge plate for maker marks. Victorian brooches feature C-clasps and tube hinges; 20th-century brooches tend to use safety catches and stamped backs. The construction of the hinge and pin bar often indicates period and quality.
- Signet rings: flat engraved face, thick shank, hallmarks often inside the band.
- Cluster brooches: grouped small stones in prong settings — check underside for soldering and maker’s punch.
- Chain types: curb, rope, box, and snake chains show different link construction—inspection near the clasp reveals quality and linking method.
- Earrings: screw-backs and pierced posts have different attachment hardware; post thickness and backing style can indicate era and value.
Limitations
Photos and visual clues are powerful for initial sorting, but they have limits. Hallmarks can be forged or filed, plating can mimic solid metal, and high-quality lab-grown stones can visually match natural gems. Surface appearance alone rarely proves age, maker, or true precious metal content without corroborating tests or provenance.
Non-destructive in-home checks (magnet test, weight feel, loupe inspection) help triage pieces but can mislead. For example, some non-magnetic base metals pass a light magnet test and plated items can weigh like lower-carat alloys. Similarly, a crisp hallmark increases confidence but is not absolute proof—marks can be added later or removed and re-stamped.
When to seek professional verification: get a written appraisal when value matters for sale, inheritance division, insurance, or legal reasons. Use independent appraisers or recognized labs for gemstone origin and metal assays. If you plan resale or replacement, combine your visual checks with a formal test rather than relying on photos or single clues.
- Hallmarks raise confidence but are not definitive proof of composition.
- Plating and wear can hide true base metals until tested.
- High-quality imitations and lab-grown stones can mimic natural gems visually.
- Professional assays, x-ray fluorescence (XRF), and gem labs are the routes to certainty.
Related guides
Want a second look? Use a dedicated identification tool
If you’ve gathered photos and hallmark notes, consider using an identification tool to organize your evidence and compare similar pieces. Jewelry Identifier’s matching tool can help you sort likely jewelry types and surface-level comparisons; use it as a first pass after you’ve photographed and transcribed marks. For valuation, authentication, or legal needs, follow up with an independent appraiser. Start here to organize your finds: https://jewelry-identifier.app/tools/jewelry-identifier
Take the next step →Frequently asked questions
Which jewelry identification guide should I use to sort a mixed estate?
For a mixed estate, start with a systematic workflow: photograph each item (face, side, back, and closure), transcribe any hallmarks, and group pieces by function (rings, necklaces, brooches). Use a checklist that includes hallmark reading, setting type, clasp/hinge quality, and wear-through signs. That checklist functions as a working jewelry identification guide: it helps you triage pieces for quick sale, appraisal, or deeper lab testing. If items may be high-value, pause and contact a certified appraiser before separating or cleaning anything.
How do I use jewelry visual clues to tell plated from solid metal at home?
Start by inspecting edges, joins, and places that rub against skin—wear-through often shows a different color beneath plating. Look under clasps, inside rings, and around hinge pins with magnification for a different metal tone. Perform a magnet test (solid gold and silver are not magnetic) and compare the piece’s heft to a similar known item; plated pieces are usually lighter if the core is base metal. These visual clues are good triage tools, but a non-destructive metal assay (XRF) or a jeweler’s acid test is needed for definitive confirmation.
What hallmarks should I record when identifying jewelry types?
Record every visible character exactly as it appears: numbers (e.g., 925, 14K, 750), letters, pictorial assay marks, and maker’s punches. Note placement (inside shank, under the bail, on hinge plate) and the mark’s clarity. Photograph the mark with scale and transcribe it in full; partial or worn marks can still be useful when combined with construction and setting clues. Use hallmark guides or trusted online databases to interpret these symbols before assuming origin or purity.
When should I get a professional appraisal instead of relying on visual ID?
Seek a professional appraisal when the piece may have significant monetary value, when provenance affects inheritance or insurance, or when you plan to consign or sell at auction. You should also get professional testing if visual clues contradict (for example, a crisp 18K stamp on a piece with obvious base-metal wear). Professionals can provide written reports, lab testing for gemstones, and non-destructive metal assays—services that visual ID alone cannot replace.