

Ring Setting Types: Prong, Bezel, Channel, and Pave Clues
Learn which visible clues reliably indicate common ring setting types, which cues are weak, and practical next steps when a photo alone can’t prove the answer.
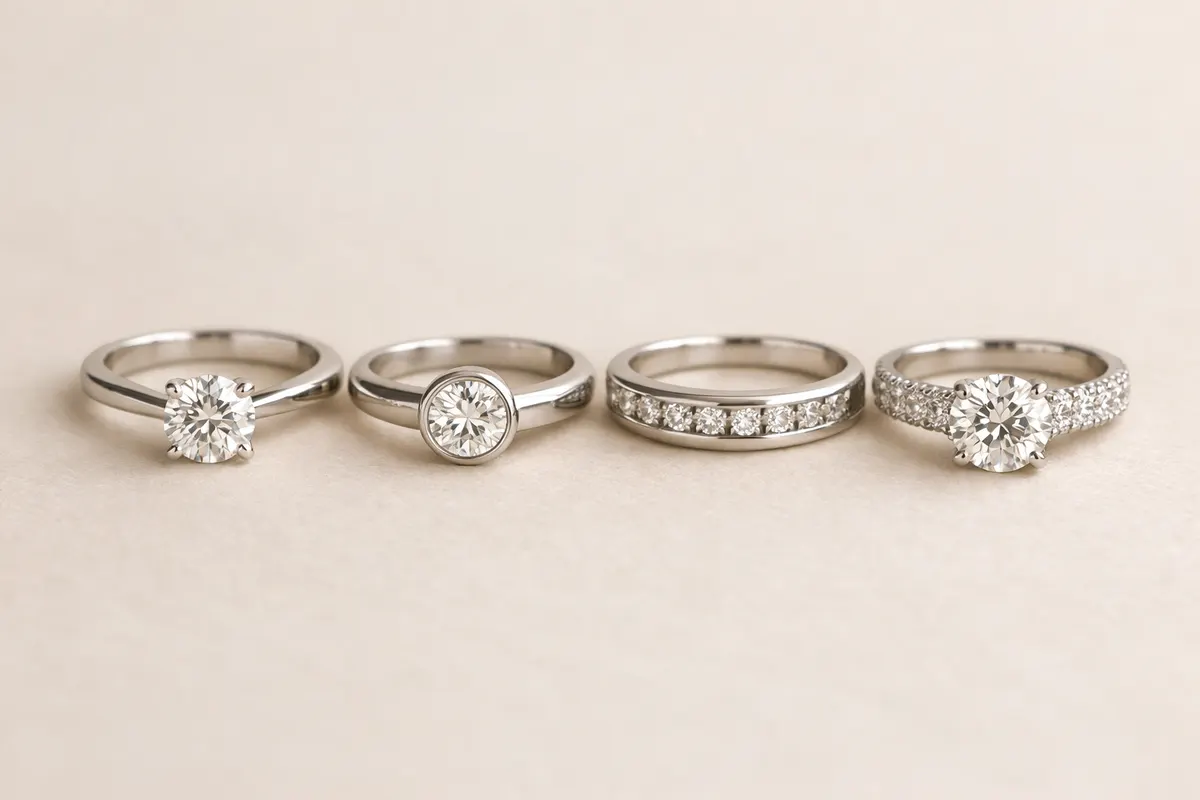
Quick answer: reading ring setting types from photos
Ring setting types can often be suggested from a clear photo, but a single image rarely proves the full construction. The strongest immediate signals are how the stone is held (visible metal edges or prongs), the profile of the ring (flat bezel lip, raised prong heads, or a channel groove), and how multiple stones relate to each other (continuous metal between stones for channel, tiny shared beads for pavé).
For quick identification, focus first on three things you can see from a typical phone shot: the metal around the stone, the stone’s edge relative to the band, and whether metal separates or secures adjacent stones. Those clues separate prong, bezel, channel, and pavé in most photos because they describe how the metal interacts with the gem rather than relying on color or sparkle alone.
Keep expectations realistic. Photos show shapes and relationships, not internal soldering, hidden cups, or exact gauge of metal. Treat the visual read as a working hypothesis: useful for cataloging, searching, or deciding whether to research or take the piece to a bench or app for a closer look.
- Prongs: look for discrete metal claws or rounded heads that hold the stone at multiple points.
- Bezels: look for an unbroken metal rim wrapping the stone’s edge, often flush or slightly raised.
- Channel: look for a metal channel with stones set flush and the band’s top edges forming rails.
- Pavé: look for many small stones set close together with tiny beads or shared metal separating them.
Strong visual clues that survive phone photos
When you only have a phone photo, prioritize geometry over color. The clearest, most repeatable clue is the metal-to-stone contact line: a continuous rim almost always indicates a bezel; discrete claws at cardinal points indicate prongs; parallel rails indicate a channel; and a textured field of tiny beads or claws indicates pavé. These geometry cues hold up under different lighting and modest focus issues.
Second, use profile shots. A side or three-quarter photo that shows the ring’s silhouette can reveal whether a stone sits in a cup (bezel), is elevated (prong), or lies flush between rails (channel). The height and shape of prongs — tapered, rounded, flat-topped — are often visible even when the stone is bright or reflective.
Third, inspect stone spacing and metal rails. Channel settings show a continuous trough with the stones’ girdles almost touching and metal rails running along both sides. Pavé shows many small stones with tiny metal beads or shared prongs between them; the metal there looks like a dotted pattern rather than full rails. These spacing patterns are robust clues because they describe how multiple stones are fixed together.
Finally, watch for tool marks and wear patterns. Signs of re-tipping (fresh metal on prong tips), solder seams near a bezel, or groove wear inside a channel can confirm a setting type when visible. Even old rings show consistent wear patterns: prongs thin where fingers rub, bezels develop small dents along the rim, and channel rails wear on the top edges first.
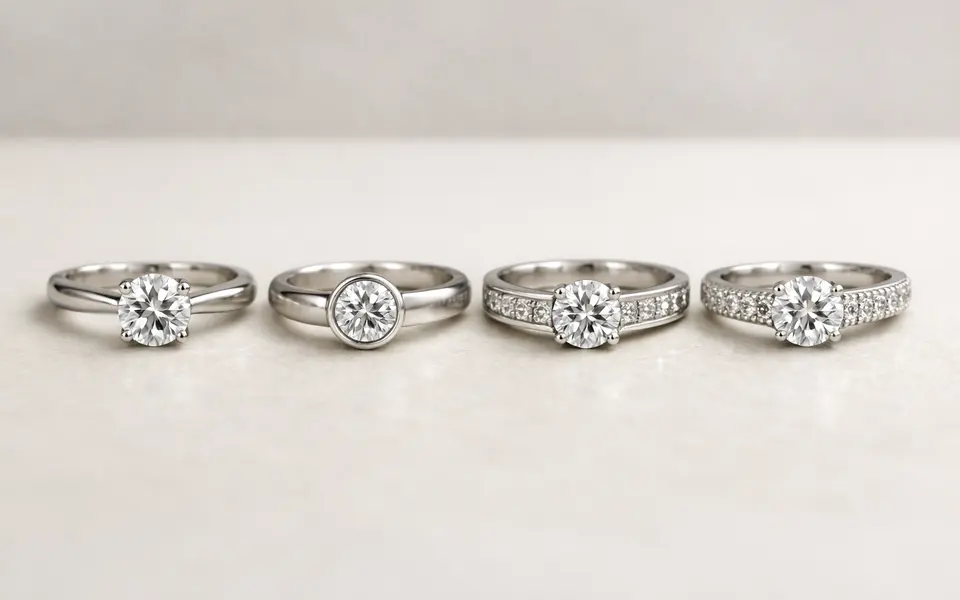
- Metal-to-stone contact line: rim = bezel; claws = prong; rails = channel; dotted metal = pavé.
- Profile silhouette: cup or rim visible from the side suggests a bezel; lifted stone with clear gaps suggests prongs.
- Stone spacing: continuous tight row with rails = channel; irregular tiny stones with beading = pavé.
- Wear and repair cues: re-tipped prongs or solder seams can confirm original setting type.
Weak signals that often mislead setting ID
Color and sparkle are poor clues for ring setting types. A bright, sparkly stone can look like it’s set in prongs even when a low-profile bezel or illusion mount is present. Reflections and glare hide the metal that matters, so don’t let stone brilliance substitute for metal geometry.
Single-angle photos and extreme close-ups can mislead. A macro shot of the crown of a stone might show tiny metal beads that resemble pavé when they are in fact milligrain decoration on a bezel; similarly, lighting that flattens contrast can make prongs appear as a continuous rim. Without multiple angles, you risk reading decorative finishing as structural setting.
Hallmarks, stamps, or surface discoloration are also unreliable for setting ID. They tell you about metal content or maker but not how the stone is held. Likewise, jewelry style or era hints — Art Deco shapes, Victorian engraving — suggest likely settings but are not proof. Use these as context, not as the determining factor.
Finally, assumed terminology and names can confuse: some people call a low prong with a thin bezel rim an ‘semi-bezel’ or an ‘illusion’ mount. Those hybrid terms can be useful but avoid relying on them when the photograph doesn’t clearly show which metal element is structural versus decorative.
- Don’t use stone color, fire, or brilliance as proof of setting type.
- Avoid calling decorative milligrain or engraving a setting—focus on metal that contacts the stone.
- One-angle close-ups can confuse bezel lips with tight prongs; always seek a profile.
- Watch hybrid mounts: semi-bezels, illusion settings, and re-tipped prongs complicate labels.
How to compare ring setting types step-by-step
Use a checklist approach: 1) find a profile shot, 2) identify the metal-to-stone interface, 3) note stone spacing and rails, and 4) look for repair or wear marks. Comparing possible matches becomes fast once you separate those four categories of evidence. Start by eliminating impossible matches — for example, if you see rails, rule out a true bezel immediately.
When two settings look similar in one photo, bring in orthogonal clues. If a setting could be either a low prong or a semi-bezel, check the band edge and the stone’s girdle visibility. In a low prong, you’ll usually see tiny gaps or bead seats between prongs; a semi-bezel will show a continuous thin rim around a portion of the girdle even if it’s not full-height.
Create side-by-side comparisons from reference images. Take a clean photo of the unknown ring and crop it to the same scale as reference examples of prong, bezel, channel, and pavé. Matching visual proportions — how much of the stone the metal covers from the top and from the side — reduces subjective language like “looks like” and moves the read into measurable differences.
Log ambiguous features as research notes. If a ring shows signs of rework, document them: ‘prongs re-tipped; narrow bezel added at 7 o’clock.’ Those notes will help later if you seek a bench jeweler’s appraisal, want to sell the piece, or use a visual-identification tool. Treat the photo read as provisional and include uncertainty in any description you publish or save.
- Step 1: Get a profile plus top shot; prioritize the side profile if you must pick one.
- Step 2: Identify the metal-stone contact zone before labeling the setting type.
- Step 3: Compare spacing: rails (channel) vs. beads (pavé) vs. isolated claws (prong).
- Step 4: Note repairs, hybrid features, or decorative milling that may disguise the structure.
App workflow after checking ring setting types clues
After you’ve used the visual checklist, the app can be a next-step research tool to suggest likely matches and similar examples. Open the app and use a clear top and side photo pair where possible. Ingesting two angles gives any visual system stronger geometric signals and reduces misreads caused by glare or reflections.
Treat the app’s result as a prioritized hypothesis rather than a diagnosis. If the app suggests ‘prong’ but you see a thin bezel lip in the side photo, keep both possibilities in your notes. Use the app to pull reference images that match your ring’s proportions; comparing the app’s examples to your own close-up profile helps confirm or reject its suggestion.
If the app’s images or tags highlight repairs or hybrid mounts, follow up with a bench jeweler for confirmation. The app is best used to narrow possibilities and find close matches quickly; it cannot replace hands-on inspection for structural questions, soldering, or metal content tests. Always annotate uncertain results when you archive or share them.
For safety and clarity: do not rely on a single photo to claim provenance, value, or authenticity. Use the app after you collect the visual clues described above, and if the result affects insurance, sale, or repair decisions, use the photo-based read only as the first step toward professional verification.
- Upload two photos if possible: top view and side profile for stronger results.
- Treat app suggestions as hypotheses; compare returned examples to your profile shot.
- Flag and document repairs, hybrid features, or unclear rims for bench verification.
- Use the app to find similar pieces and language for listings, but not as proof of authenticity.
Related guides
Confirm your visual read with Jewelry Identifier
After you’ve checked the key ring setting types clues — metal-to-stone interface, profile silhouette, stone spacing, and repair signs — use Jewelry Identifier as a second pass to find close visual matches and reference images. Treat any app result as a research note: compare returned examples to your side profile, flag hybrid or repaired features, and document uncertainty. If the setting affects value or repair choices, follow the app’s suggestions with an in-person bench check.
Take the next step →Frequently asked questions
Can I tell whether a ring is prong, bezel, channel, or pavé from a single photo?
Sometimes. A single well-composed photo that clearly shows the metal-to-stone interface and the ring profile can strongly suggest a setting type. However, single angles often hide critical details: glare can hide a bezel lip, and close-ups of a crown can mimic pavé beads. Whenever possible, add a side profile and a slightly offset three-quarter shot; if you must rely on one photo, treat the read as provisional.
What photo angles reveal the most about ring setting types?
The two most valuable angles are the top (plan) view to show stone arrangement and spacing, and the side (profile) view to show how the metal meets the stone. A three-quarter view that captures both the crown and the shoulder can be a good compromise. Macro images focused only on the table can miss the metal contact and lead to false positives.
How do repairs, re-tipping, or hybrid mounts affect visual identification?
Repairs and re-tipping change surface appearance without altering hidden structure; they can make prongs look fresher or bezels appear newly formed. Hybrid mounts combine features—an illusion mount may have a thin bezel rim with hidden prongs—so a photo might show both clues. When repair signs are visible, note them explicitly: they increase uncertainty and should trigger a bench check if the setting type matters for valuation or repair.
When should I seek a jeweler instead of relying on a photo read?
Seek an in-person jeweler when the setting type affects value, repair method, or safety—for example, loose stones in a worn prong, an unknown hybrid that could require reshaping, or suspected solder seams near a bezel. Also consult a jeweler if you need provenance, hallmark verification, or metal testing. Use photo-based identification to prepare notes and ask precise questions at the bench, not as a substitute for hands-on inspection.